How to make a metaballs sculpture with Blender and Sverchok
Today I will try a new format, where the blog post will go together to a YouTube video. Hence I invite you to subscribe to the brand new CodePlastic channel!
For this tutorial I took inspiration from this work:
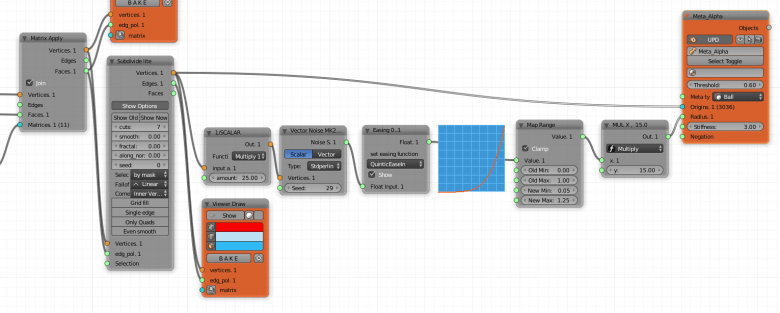
To create something similar I decided to use metaballs. Sverchok has a node called just like that, where we provide the positions of the metaballs and all the other necessary settings:
I invite you to watch the video to see the whole process of implementing the node tree, however these are the main steps:
1. Create an asset in the viewport or directly in Sverchok
This will be the foundation of our structure. In my case I created a polyhedron in the viewport, I imported it to Sverchok and I applied a list of position matrices based on a Perlin noise vector field.


2. Subdivide the edges of the asset and apply a metaball at each vertex
We could now apply the metaballs at the vertices of the asset but most likely we won’t get a good result. First we need to increase their number using a subdivision node. Then we can use some more vector noise tricks to add interesting variations to the radius of the different metaballs.

Finally we can start rendering, or we can export for 3D printing. Remember that you can influence the resolution of the metaballs in the Properties of the node, after selecting it.
And the metaballs sculpture is ready!


Interested in Sverchok? Then check out Learning Sverchok, the free ebook by CodePlastic!


